

The next step in the construction of the LeBlanc staff was to coat it in Shell Shock. We here in Atlanta get the stuff at Engineer Guy, near the airport. In short, it’s a liquid plastic that can be applied onto a myriad of surfaces, and is durable enough that after it cures, it can be sanded and painted, while maintaining a hard and substantial integrity. Coating the LeBlanc staff would give it a little bit of heft, durability, and give it a better surface to paint on than just plain insulation foam.
Like a retard, I set myself up for a ton of extra work, by pre-assembling the staff in its entirety before Shell Shocking it. To be perfectly honest, this was the step that puzzled me the most, and when I did it, it seemed like a good idea at the time, but in the end, this sets me up for a lot of extra work that might be harder than all other alternative methods discussed, that I could have done. No matter, with everything assembled and adhered, there was nothing more I could do to go back, so it’s all or nothing from here.
My rationale is that if I apply the Shell Shock with paint brushes instead of slathering the goo on with popsicle sticks, I could smooth it out and apply it thinner and more refined, resulting in less clumping in the cracks, and do my best to make it look less messy. From what I’ve done in this update, it’s so far so good, but there’s still a lot more to do ahead of me, so who knows how much I’ll hate life as this process goes on.
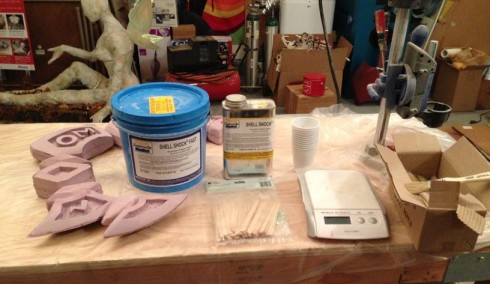
Pictured above, is everything I need for this step. The Shell Shock is a two-part compound that consists of the base goo, and the stuff that activates it; don’t look at me to be any more descriptive than that, I just use the stuff. I also utilize a litany of disposable paint brushes, dixie cups and popsicle sticks. Toothpicks are also handy for scraping out Shell Shock from tight crevices before it cures. And most importantly, a scale to measure out the chemicals.
This update isn’t as photographically intensive as prior ones because it’s a very time-sensitive procedure, and I simply don’t have the time to stop what I’m doing and take pictures when the mixed Shell Shock has barely 180 seconds of active pot life. So trust that I’ll hopefully be descriptive enough.
The amazing thing about this Shell Shock that I’m using is that it’s been sitting in the garage for almost an entire year now. The stuff is labeled saying that it should be stored at a consistent temperature of 75F degrees, but being out in the garage for a year means it’s sat through essentially three full seasons and their fluctuating temperatures, instead of the supposed requirement. Considering how much there was in the container, I had a hard time just tossing it, so I tested to see if it was still useable.
I thought it was trash when I opened it up, and saw an amber liquid looking back at me; the stuff is typically gray in color. But I quickly realized that it was a lot like unmixed, dormant paint. I stirred it up, and it regained its gray color and its original consistency. Testing a tiny batch, I found that it worked as I had learned how to use the stuff a year ago. I was good to go.

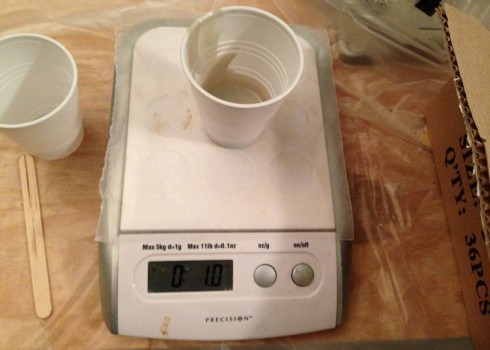
In one dixie cup, you put the base Shell Shock. I was taught that the ratio is essentially 1.0:0.1; so basically for every full ounce you need, you’ll need a tenth of activator to mix in. Since I was dealing with a pretty fine-detailed project, I only wanted to go with small batches, so an ounce at a time was what I was going to work with.

As you can see, with one ounce being used, I only need 0.1 ounces of the activator. It really is not a lot, visually.
Pour the activator into the base, and stir vigorously. The chemical reaction will literally make the cup feel artificially warm, which is a sign that it’s ready to go; and do not waste time.
Shell Shock is sold as a either fast or slow compounds, and it all has to do with its pot life AKA how much time you have to use it before it starts to harden and cure. I learned using Shell Shock slow, which once mixed gave me a pot life of eight minutes, but the flip side to it is that the cure time is literally several hours. After using an entire container of slow, I realized that I was ready to move onto Shell Shock fast, which has an estimated pot life of three minutes, but also cures substantially faster, in about a single hour in total.
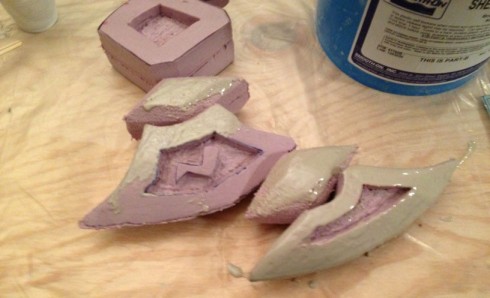
As I said, time can’t be wasted when the stuff is active. Pictured here is about all I could do with a single ounce of Shell Shock. I very much have a long road ahead of me, and that’s not even considering the sanding and then painting processes that will be required in order to complete the staff head.
Since the stuff needs to cure before being coated again, once I use up the ounce, I simply have to give up on that particular segment, and move onto another part. I’ve never tried it, it’s never recommended, but I can’t imagine that it’s particularly good to re-coat an area that hasn’t been fully cured yet.
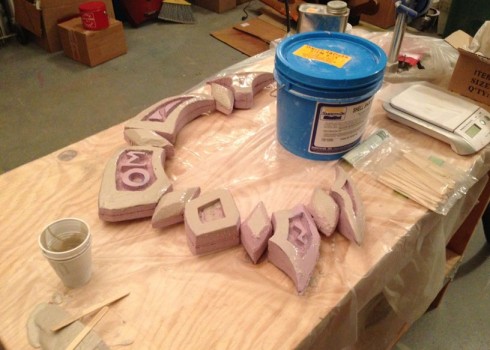

And this is the result after two more mixtures. I did two ounces to coat the next batch of Shell Shocking, and then one more ounce to coat the upper left tip area of the staff. And for one evening, this is all I can really do, since on work days, I only have so much time to do any Shell Shocking, and the stuff has to before proceeding again.
As you can see, I have a long road ahead of me in regards to this part alone, and I’m still a little perturbed at myself for putting myself in this predicament. But I’m still optimistic that I can get it looking pretty decent in the end, but it’s going to require some time and work. I don’t think I’m going to utilize that many coats in the end, since I don’t want this to gain too much weight, and frankly, I expect the people holding this staff to be careful with it from the onset.
The next update might be a little while, since until then, it’s going to be essentially this step over and over again until the thing is adequately coated up. So hold on to your butts ’til then.